Custom Jewelry For Any Occasion…
Signe's Metal Clay World
Latest works, process, sucesses, failures, discoveries and everything in between...What exactly is Metal Clay?
If you have questions regarding prices or general inquiries and have trouble accessing my online shop, please contact me here
Learning Repousse
Find out about Holly Gage's Repousse technique using Metal Clay!
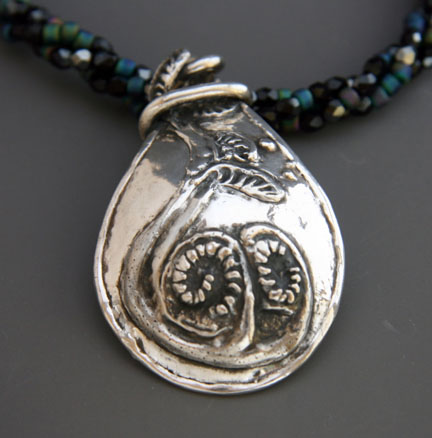
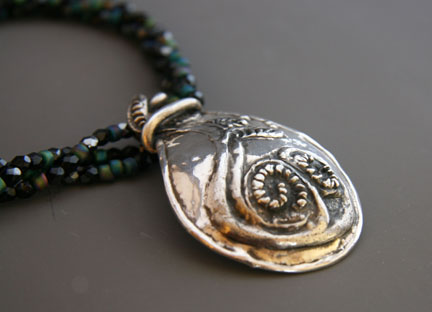
I recently took a class from Holly Gage to learn the art of repousse with metal clay. It was a lot of fun and a great learning experience to add to the tool belt. Although many would argue that the process is not actually repousse at all, I would argue that it is a new art form that requires different skill set to achieve a very similar outcome to that of repousse. For the sculptor in me, I find this technique extremely satisfying and hope to explore it further it the future.
Now bear in mind that I am relatively new at all this and I make mistakes just as much as the next person so take my advice with a grain of salt. That is partly why I write this. I figure I can give the newbies a little peace of mind that they aren’t the only ones out there who mess up but there are a lot of ways to fix them if you just have some patience and a bit of creativity. In fact, here’s a really good one for you...
Recently, I found out that I have been firing my pieces incorrectly. I aways wondered what all this “ramping up” temperature nonsense was about. I only just got my own kiln and it didn’t come with instructions, so I’ve been guessing a lot with a great deal of success....so far. At any rate, I was getting my kiln up to the 1650 temp and then putting my piece(s) in for the allotted 2 hours firing time. (For those who don't know, and because this part was confusing to me I feel it is necessary to reiterate, you should stick your greenware or bone dry/ unfired piece(s) in a cold kiln and then bring it up to the full firing temp you need. Once you reach the firing temp, you can then begin the countdown clock).

I feel it is important to explain that I have been firing all my pieces using the first method mentioned for quite some time. It never seemed to be a problem until recently when I tried to fire one of my largest and thinnest pieces. When I pulled my piece out, there were little bubbles all over the front and back of the piece! I thought it was ruined. After some deep breathing and an emergency call to Holly Gage for advice, I decided to try burnishing them all down to see if they would disappear. Fortunately, that seemed to do the trick. I kept a few of them on the front because I actually liked the design element they added (you can see them clearly on the top most photo). It just goes to show you that your worst nightmares can turn into something you can be proud of if you keep pushing through. Also, despite the fact that I didn't have many previous failures using my original firing method, I think I will not risk this happening again and I will go with the conventional method now that I now what it is!
Also check out this article in Metal Clay Artist Magazine's blog to see where my necklace is featured! Yay!


